25 Homesteading Garden Layout Ideas (Tested on Under an Acre, Not a Fantasy Farm)
We have 0.6 acres, and when we first started trying to grow a real portion of our own food, I kept pulling up homesteading layouts online that assumed five, ten, even twenty acres.
None of it translated. It took two full growing seasons of trial and error — and one genuinely embarrassing incident where our squash vines took over the entire path to the chicken coop — before our layout actually started working with the space we had instead of against it.
These 25 ideas are built for people working with a quarter acre to a couple of acres, not a sprawling homestead.
I’ve grouped them by the problem they solve — space efficiency, sun and water management, animal integration, and the stuff nobody plans for until year two — because that’s genuinely how layout planning works in practice.
You don’t design a homestead garden all at once; you keep solving the next problem that shows up.
Space-Maximizing Layouts for Small Properties
1. The Keyhole Garden Bed Cluster
Keyhole beds (circular raised beds with a notch cut in for walk-in access to a center composting basket) pack more growing space into less total footprint than traditional rows, because you’re not wasting space on wide paths between every single row.
Pro tip: Build the composting basket in the center slightly larger than most tutorials suggest. Ours was too small the first year and needed refilling with kitchen scraps almost weekly, which got old fast.
2. Vertical Trellis Wall Along a Fence Line
If you already have a fence line, running trellis panels along it for pole beans, cucumbers, and indeterminate tomatoes essentially gives you a second growing wall without using any additional ground footprint.
3. Raised Bed Grid With Narrow Walking Paths
A grid of 4×8 raised beds with 18-inch walking paths (just wide enough for a wheelbarrow) between them maximizes growing-to-path ratio better than wider traditional row spacing, and it keeps weeding contained to defined, manageable zones.
4. Three Sisters Planting Block Instead of Separate Rows
Corn, beans, and squash grown together in the traditional three sisters method (corn as a trellis for beans, squash as ground cover suppressing weeds) does the work of three separate crop rows in roughly the footprint of one.
| Layout Style | Space Efficiency | Best For |
|---|---|---|
| Keyhole beds | High | Small properties under half an acre |
| Vertical trellis | High (uses vertical space) | Fence lines, narrow lots |
| Raised bed grid | Medium-high | Organized, low-weed-pressure growing |
| Three sisters block | Medium-high | Classic staple crop combo, less watering |
5. Intensive French-Style Square Foot Beds
Square foot gardening (dividing beds into 1-foot squares, each planted densely with a specific crop) gets more total yield per square foot than traditional spacing, at the cost of needing richer soil and more consistent watering to support the density.
Sun, Water, and Soil-Smart Layouts
6. South-Facing Terraced Beds on Sloped Ground
If your property has any slope, terracing beds that follow the contour (rather than fighting it with flat beds dug into a hillside) prevents erosion and actually improves water retention, since each terrace catches runoff from the one above it.
7. Sun-Mapped Zones: Full Sun, Partial Shade, Shade-Tolerant Crops
Before laying out beds, track actual sun exposure across your property for a full day (not just a guess) and zone your crops accordingly — tomatoes and peppers in the full-sun zones, lettuce and brassicas where afternoon shade naturally falls.
Pro tip: Do the sun mapping in the season you’ll actually be planting, not in winter. Deciduous trees that look bare in March can fully shade a bed by June once they leaf out.
8. Swale and Berm System for Water Catchment
A swale (a shallow ditch on contour) paired with a berm (the mounded soil beside it, planted with the actual crops) slows and catches rainwater runoff instead of letting it sheet off the property, which matters a lot if your area gets heavy, infrequent rain rather than steady drizzle.
9. Drip Irrigation Zones Mapped to Plant Water Needs
Laying out beds in zones by water need (high-water crops like squash and cucumbers together, low-water crops like herbs and root vegetables together) lets you run separate drip irrigation lines on different schedules instead of overwatering half your garden to keep the thirstiest plants happy.
10. Raised Beds Over Poor or Rocky Native Soil
If your native soil is rocky, heavy clay, or otherwise difficult, raised beds filled with a proper soil mix let you skip years of soil amendment and start growing productively in the first season, which matters a lot when you’re trying to actually feed a household.
| Water Zone | Crop Examples | Irrigation Approach |
|---|---|---|
| High water need | Squash, cucumbers, leafy greens | Daily or near-daily drip |
| Medium water need | Tomatoes, peppers, beans | Deep watering 2-3x/week |
| Low water need | Herbs, root vegetables, alliums | Weekly or as-needed |
Animal-Integrated Layouts
11. Chicken Tractor Rotation Bordering the Garden
A movable chicken tractor (a bottomless, portable coop) rotated along the edges of your growing beds lets chickens clear cover crops and fertilize fallow sections without free-ranging directly into your actively growing beds and destroying seedlings.
12. Garden Beds Radiating Out From a Central Coop
Laying beds out in a rough semicircle or radial pattern around a central chicken coop or small barn shortens the daily walking distance for feeding, egg collection, and garden chores — a detail that matters more than it sounds like once you’re doing it every single day for years.
13. Buffer Hedge Between Livestock Grazing and Vegetable Beds
A hedge or dense shrub row between any grazing animal area (goats especially) and your vegetable garden prevents the inevitable day an animal gets loose and discovers your lettuce bed exists. We learned this one the hard way with a neighbor’s goat, not even our own.
14. Dedicated Compost Zone Near Both Animal Pens and Garden Beds
Positioning your main compost area roughly equidistant between animal pens (for manure) and garden beds (for finished compost application) cuts down on hauling distance in both directions, which adds up over a full season of daily trips.
15. Beehive Placement With a Flight Path Away From High-Traffic Areas
If you’re keeping bees, position hives with their flight path oriented away from walking paths and seating areas — a slight angle change in hive placement avoids a surprising number of “someone walked through the bee highway” incidents.
Crop Rotation and Succession Layouts
16. Four-Zone Rotation Plan Mapped Directly Onto Your Beds
Dividing your growing space into four rotation zones (heavy feeders, legumes, light feeders, cover crop/fallow) and physically mapping which beds belong to which zone each year prevents the soil depletion and pest buildup that comes from planting the same family in the same spot repeatedly.
17. Succession Planting Strips for Continuous Harvest
Narrow, dedicated strips (rather than full beds) for fast-growing crops like lettuce, radishes, and bush beans let you succession-plant every two to three weeks without disrupting your main rotation, so you’re not waiting for one massive harvest and then nothing.
18. Cover Crop Rotation Bed Set Aside Each Season
Permanently designating one rotating bed each season purely for cover crops (clover, buckwheat, winter rye depending on season) instead of squeezing cover cropping into “whatever’s empty” meaningfully improves soil health over a multi-year cycle.
Pro tip: Mark your rotation zones with physical stakes or a simple garden map you actually keep updated — “I’ll remember what I planted where” lasted exactly one season for us before we lost track and planted tomatoes in the same bed two years running.
Pathways, Access, and Daily-Use Layouts
19. Main Wheelbarrow Path as the Garden’s Spine
Laying out one wide, mulched or gravel main path as the “spine” of the garden, with all your beds branching off it, keeps daily hauling (compost, mulch, harvest baskets) efficient instead of winding through narrow gaps between beds.
20. Tool Shed or Storage Positioned at the Garden’s Center of Gravity
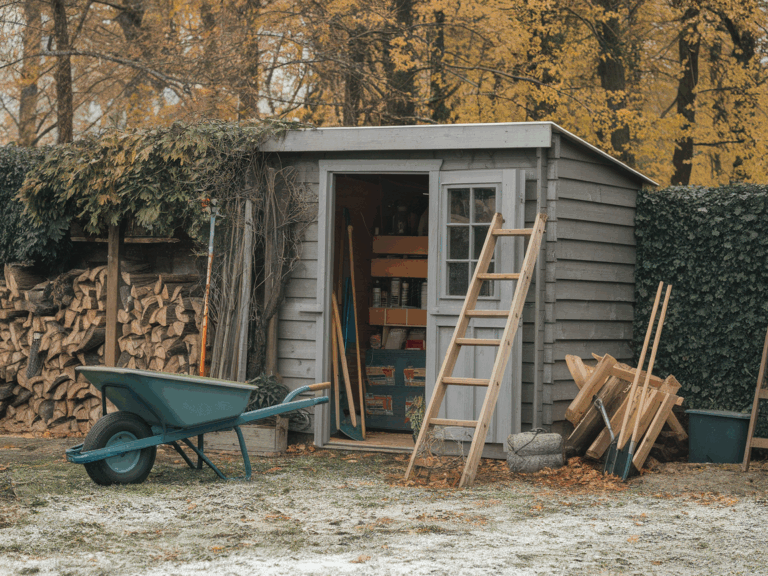
A small tool shed or storage box placed at roughly the center of your growing area, rather than off at the edge of the property, cuts down dramatically on the number of trips back and forth for forgotten tools.
21. Herb Spiral Near the Kitchen Door
An herb spiral (a raised, spiraling mound that creates multiple microclimates in one small footprint) placed near your kitchen door, rather than out in the main garden, keeps daily-use herbs like basil, thyme, and rosemary on the path you’re already walking.
22. Harvest Basket Station at Each Major Bed Cluster
Simple hooks or a small shelf for harvest baskets at two or three points around the garden (not just one central spot) means you’re not carrying an empty basket across the whole property every time you want to pick something.
Season Extension and Microclimate Layouts
23. Cold Frame or Low Tunnel Zone for Early and Late Crops
Dedicating one bed or zone specifically for cold frames or low tunnels extends your actual growing season on both ends without needing a full greenhouse investment, and it’s a realistic first step before committing to one.
24. South-Facing Wall Microclimate for Heat-Loving Crops
Planting heat-loving crops (peppers, melons, eggplant) along a south-facing wall takes advantage of the radiant heat the wall holds and releases, effectively creating a warmer microclimate zone within an otherwise average growing area.
25. Windbreak Hedge or Fence on the Prevailing Wind Side
A hedge, fence, or even a row of sunflowers planted on the side your prevailing wind comes from protects tender seedlings and reduces moisture loss across the whole garden — a detail that matters a lot more in exposed, open properties than in anything with natural windbreaks already.
| Season Extension Method | Investment Level | Added Growing Weeks |
|---|---|---|
| Cold frame | Low | 2-4 weeks each end |
| Low tunnel | Low-medium | 3-6 weeks each end |
| South-facing wall zone | None (positioning only) | Variable, climate-dependent |
| Windbreak | Low-medium | Indirect (protects existing season) |
What I’d Do Differently
If I were laying our garden out from scratch again, I’d do the sun mapping (idea #7) before anything else, including before buying a single raised bed kit. We built our first set of beds based on where we assumed the sun would be, and two of them turned out to get barely four hours of direct light once the trees leafed out fully. Moving established beds is a much bigger job than planning around sun exposure from the start would have been.
Frequently Asked Questions
How much land do I actually need to start a homesteading garden? A quarter acre of actual growing space can support a meaningful amount of food production for a small household if the layout is efficient — raised beds, vertical growing, and succession planting all increase yield per square foot significantly beyond traditional row spacing.
Should I plan my whole layout before planting anything, or build it out gradually? A rough overall plan (sun zones, water zones, main paths) is worth doing upfront, but the specific bed-by-bed layout is almost always better built out gradually over a season or two as you learn your actual sun, water, and soil conditions firsthand.
How do I keep chickens or other livestock from destroying my vegetable beds? A physical barrier (fencing, a buffer hedge, or a chicken tractor system that rotates them around the garden’s edges rather than through it) is close to essential — free-ranging directly adjacent to actively growing beds rarely ends well.
What’s the biggest layout mistake new homesteaders make? Underestimating path width and access needs. A lot of first-year layouts look efficient on paper but become genuinely frustrating once you’re hauling a wheelbarrow of compost or mulch through gaps that are too narrow.
How often should I rotate crops within my garden layout? A three- to four-year rotation cycle (so the same crop family doesn’t return to the same bed for at least three seasons) is the standard recommendation for managing soil depletion and pest and disease buildup effectively.

Hi, I’m Ashley Miller, a wife, a busy mom, and someone who loves to share all the things that make life a little more fun and beautiful.
From easy DIY projects, delicious recipes, and chic hairstyles to nail ideas and home decor tips, I share everything I’ve learned and love.
My goal is to inspire other women to explore their creativity and make their homes even more special.