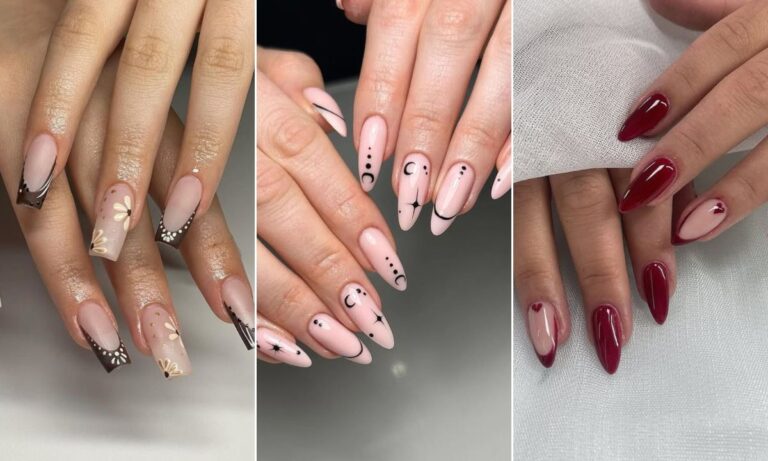
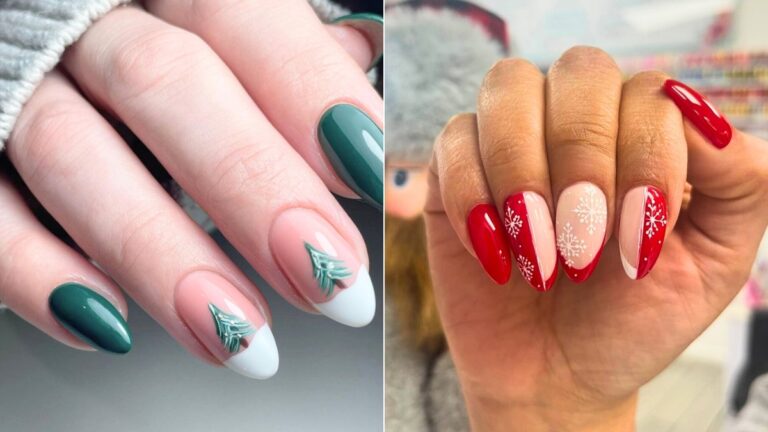
21 December Nails That Actually Look Good IRL (I Tried the Weird Ones So You Don’t Have To)
I have a confession: I used to think December nails meant the same three things every year. Candy cane stripes.
A snowflake decal that peeled off by December 12th. Maybe a red that looked exactly like the red I wore the year before.
Then my friend Priya showed up to our holiday dinner with sweater nails. Not Christmas sweater nails — actual knitwear-inspired nails.
Argyle patterns. A fuzzy velvet texture on the tips that looked like cashmere. I spent the entire appetizer course staring at her hands instead of my risotto.
That was three Decembers ago. Since then, I’ve tested at least 40 different December nail designs — some in salons, some at my kitchen table with a dotting tool and too much confidence.
I’ve had sets that lasted through New Year’s and sets that chipped before I finished my coffee the next morning.
I’ve learned which trends are worth the salon money and which ones look better on Pinterest than on actual human hands.
Here’s what I’ve figured out: the best December nails aren’t the most complicated ones.
They’re the ones that solve a real problem — like how to feel festive without looking like a walking Christmas ornament, or how to get salon-level results when you have 20 minutes and a drugstore budget.
I’m breaking down 21 designs, the winter nail care nobody talks about, and the mistakes that’ll cost you a re-do.
1. Sweater Nails Are the Unexpected Trend of the Season (and They’re Easier Than They Look)
This is the one that started it all for me. Sweater nails — think argyle diamonds, plaid patterns, and velvet-flocked textures that mimic your favorite winter knit — have been quietly taking over nail feeds since late November. Celebrity nail artist Yoko Sakakura told Marie Claire that the appeal is that they offer “a more low-key, sophisticated ‘grown chic’ holiday aesthetic” — basically, festive without screaming it.
The DIY version is genuinely doable. For a simple argyle, you need three polish colors (I used a deep maroon, an olive green, and a creamy nude), a thin nail art brush, and a steady-ish hand. Paint your base nude, let it dry completely, then use the brush to draw diagonal lines that cross in the middle. Fill in the diamonds with alternating colors. The key mistake I made the first time? Not letting the base dry long enough. My “diamonds” smeared into a muddy brown blob that looked like a bruise.
For the cashmere/velvet texture, you’ll need velvet powder and a no-wipe top coat. Dip your fingertip into the powder after curing the top coat, then brush off the excess. It feels weirdly luxurious and lasts about five days before it starts to look fuzzy in the wrong way.
Pro tip: If you’re doing this at home, skip the velvet powder on all ten nails. Do it on your ring finger and thumb only. The full set looks incredible in photos but catches on everything — sweaters, hair, your own face when you’re tired. Trust me.
What it costs: Salon sweater nails run $65–$95 depending on the complexity. DIY supplies (velvet powder, brushes, a few polishes) will set you back about $30, and you’ll get multiple sets out of it.
2. Milky Nails with Silver Chrome Are the Low-Effort Win
If sweater nails feel like too much work, this is your answer. Milky nails — a semi-sheer, soft white that’s been everywhere this season — topped with a silver chrome powder or a chrome topcoat. It’s clean, it’s wintery without being literal, and it hides chips better than any opaque color I’ve tried.
Milky nails were the top winter nail search trend this season with nearly 445,000 searches, and glass/chrome finishes came in second at over 400,000. That’s not random hype — there’s a reason people are searching for it. The sheer finish makes your nails look longer and healthier even if they’re short and you forgot to file them.
My nail tech, Dana, told me the secret is building the milky base in thin layers. If you paint one thick coat, it looks streaky and weird. Two or three thin coats, curing between each one, gives you that lit-from-within glow. Then you buff on chrome powder with a silicone tool, seal it with a glossy top coat, and you’re done.
The trade-off: Chrome shows every single ridge and imperfection in your natural nail. If you have peeling nails or you’ve been picking at your cuticles (I see you), do a ridge-filling base coat first. Otherwise, the chrome will highlight exactly what you were trying to hide.
Pro tip: Chrome powder works over any base color. Try it over a soft lavender or a taupe instead of white — it’s less expected and the iridescent shift is gorgeous.
3. Jelly Burgundy Is the Upgrade Your Classic Red Has Been Waiting For
I love a classic red December manicure. It’s timeless. It works with everything. But after about six years of wearing the same red every December, I was bored.
Jelly burgundy is the fix. It’s the same rich, moody red family you already love, but the jelly finish makes it look like stained glass instead of opaque paint. Nail artist Sofiia Mazur explained it perfectly to InStyle: “It’s rich, moody, and elegant, but because it’s jelly, it feels lightweight instead of a heavy, opaque color. The translucency gives that glossy, syrupy look that makes nails appear longer and more luxurious”.
The DIY method matters here. Mazur says to start with two or three thin layers, building depth slowly, and to finish with a glossy top coat. “Jelly colors look best when the light can pass through them, so avoid over-applying,” she told InStyle. If you want extra richness in the center of the nail, add one more thin layer just there to create a natural gradient.
I did this on a Sunday night with a $9 bottle of jelly burgundy from Target, and my sister asked if I’d gotten them done professionally. That’s the highest compliment a DIY manicure can get.
Pro tip: Jelly polishes are unforgiving about streaky application. Use a wide, flat brush and float the polish on rather than dragging it. One pass down the center, then one on each side. Don’t go back over it.
What it costs: A salon jelly manicure is typically $45–$70. Drugstore jelly polishes are $6–$12, and the finish is honestly close enough for most people.
4. Icy Blue Snowflake Nails (Yes, I Know It Sounds Cheesy — Hear Me Out)
I resisted snowflake nails for years because I thought they’d look like a third-grade art project. Then I saw a set on my friend Rachel at a holiday party — tiny, delicate white snowflakes on a sheer icy blue base, with a subtle silver shimmer that caught the light every time she moved her hands. Not cartoonish at all. Genuinely elegant.
The trick is scale. Large snowflake decals on every nail look like stickers. One or two small snowflakes as accent nails, with the rest of the set in a simple shimmer or sheer blue, looks intentional. Nail artist Christina Kao told InStyle that shorter nails are actually ideal for this kind of detailed art because “a shorter length not only allows each design to speak for itself, it also makes slipping on gloves or tying on a scarf before you venture out into the cold a million times easier”.
For DIY, use a fine-tip nail art brush and white polish. Draw a small asterisk shape, then add tiny lines branching off each arm. If you mess up, wipe it off with a clean brush dipped in remover before it dries. It took me three tries on my first snowflake, but by the fourth nail I had a rhythm going.
Pro tip: Add a dot of silver glitter in the center of each snowflake. It takes two seconds and makes the design look way more expensive than it is.
5. Goth Christmas Nails Are Having a Moment (And I’m Here for It)
This is the trend I didn’t see coming. “Goth Christmas” nails — blackened greens, shadowy plums, deep vampy reds, and lots of black — are having a real moment this December. It’s for those of us who love the holidays but also love wearing black and aren’t about to change our entire personality for a manicure.
My friend Simone, who has worn black polish every December for as long as I’ve known her, finally got her moment this year when her nail tech suggested a blackened forest green with a glossy finish. She texted me a photo with the caption “FINALLY.” The color reads as green in some lights and black in others, which is basically the perfect compromise between festive and true to herself.
The easiest way to do this at home is to layer a black jelly polish over a dark green or deep plum base. Two thin coats of the jelly, and you get that murky, moody depth that looks like a winter forest at dusk. Finish with a glossy top coat — matte would work too, but the gloss makes the color shift more visible.
Pro tip: If you’re not ready to go full goth, start with a black cherry or a deep espresso brown. They’re dark enough to feel moody but warm enough to still read as “holiday” to your aunt who asks why you’re wearing black nail polish to Christmas dinner.
6. The Comparison Table: Which December Nail Style Is Actually Right for You?
I get asked this a lot: “Which one should I actually do?” Here’s my honest breakdown based on wear time, effort, and who each style is for. I’ve tried all of these at least once.
| Style | DIY Difficulty | Salon Cost | Wear Time | Best For |
|---|---|---|---|---|
| Sweater/Argyle | Medium (needs steady hand) | $65–$95 | 5–7 days (velvet fades) | People who want a statement and don’t mind touch-ups |
| Milky + Chrome | Easy | $45–$70 | 7–10 days | Anyone who wants low-maintenance elegance |
| Jelly Burgundy | Easy | $45–$70 | 7–10 days | Classic red lovers who want something fresher |
| Icy Snowflake | Medium (accent nails only) | $55–$80 | 6–8 days | Short nails, anyone tired of red and green |
| Goth Christmas | Very Easy | $40–$65 | 10–14 days (dark colors hide chips) | Black-wearers, anyone who wants longevity |
| Red + Gold Glitter Tips | Easy | $50–$75 | 7–10 days | Traditionalists, holiday party season |
A few notes from my own experience: dark colors (goth Christmas, jelly burgundy) hide chips way better than light colors. If you’re hard on your hands — typing all day, washing dishes without gloves, opening packages with your teeth (please stop) — go darker and you’ll get more mileage. Chrome and shimmer finishes show every ridge, so they’re best on nails that are already in decent shape.
7. Winter Nail Care: The Stuff Nobody Tells You Until Your Cuticles Are Cracking
Here’s the thing about December nails: the design is only half the story. Cold weather, indoor heating, and constant handwashing are brutal on your nails and cuticles. I learned this the hard way two winters ago when my cuticles cracked so badly that my gel manicure lifted on three nails within a week.
What I do now — and what actually works — is embarrassingly simple:
Cuticle oil every single night. Not when I remember. Every night. I keep a bottle on my nightstand and massage it in while I’m watching TV. Cuticle oil prevents cracking and supports nail growth, and it takes 30 seconds.
Rich hand cream, not the watery stuff. Look for glycerine, shea butter, or ceramides. I apply it after every hand wash and before bed. The difference in my nail strength after two weeks of this is not subtle.
Gloves outside. Real ones. Wearing gloves in winter isn’t just about warmth — it keeps moisture in your hands and shields them from biting wind. My mom bought me a pair of cashmere-lined leather gloves three years ago and they’ve done more for my nails than any supplement I’ve tried.
Give your nails a break between manicures. Wearing polish for weeks without pause can lead to discoloration and weakening, especially when the air is dry. I try to do one week per month with just a strengthener and cuticle oil. My nails grow faster and the polish adheres better when I do go back to color.
Pro tip: Keep a mini hand cream in your coat pocket and one at your desk. If it’s not within arm’s reach, you won’t use it. I have four scattered around my apartment and my hands have never looked better.
8. New Year’s Eve Nails: How to Transition Your December Set Without Starting Over
If you’re doing a salon set in early December and want it to carry through to New Year’s Eve, the transition matters. London-based nail artist Jessica White told Who What Wear that 2026 NYE trends are moving toward “refined sparkles, metallic details, chrome accents, and micro-shimmer finishes” rather than the full-coverage chunky glitter of years past.
My strategy: get a solid base color in early December (jelly burgundy, milky nude, or a deep green), then add an accent nail or two closer to NYE. A single chrome-dipped tip or a micro-French with gold shimmer on your ring fingers instantly reads as “New Year’s” without requiring a full re-do.
If you’re going to a salon, ask for a “holiday-to-NYE” set. My tech knows exactly what this means — a neutral or jewel-toned base with removable accent art on two nails that she can swap out without disturbing the rest.
For DIY, press-on accent nails are genuinely good now. I used a set of chrome French press-ons on just my ring fingers for a NYE party last year, and two people asked which salon I went to. They cost $8.
Pro tip: White recommends a fine-shimmer top coat to elevate any color without adding weight, and a good chrome powder to create that soft mirror effect that’s everywhere right now. Both are under $15 and last for multiple manicures.
9. What I’d Do First If I Were Starting Over
If I were doing my first December manicure from scratch, I’d skip the complicated art and go straight for a jelly burgundy or a milky chrome. They’re forgiving, they wear well, and they look expensive without being expensive. I’d pick up a cuticle oil and a rich hand cream at the same time. And I’d accept that my first attempt at snowflakes will be wonky — that’s fine. Wonky snowflakes are still snowflakes.
The best December nails are the ones you’ll actually maintain. A simple set you touch up for three weeks beats an intricate set that chips in four days and makes you hate everything.
Frequently Asked Questions About December Nails
How long do December nail designs actually last?
It depends on the finish and how hard you are on your hands. Dark, opaque colors (burgundy, forest green, black-based) typically last 10–14 days with a good top coat. Chrome and shimmer finishes last 7–10 days. Velvet and sweater textures start fading around day 5–7.
Can I do these December nail designs at home without salon tools?
Most of them, yes. Jelly burgundy, milky chrome, and solid colors need nothing beyond polish, a base coat, and a top coat. Sweater/argyle and snowflakes require a thin nail art brush and a dotting tool — both under $10. The velvet texture requires velvet powder and a no-wipe top coat, which is the one supply most people won’t already have.
What’s the best December nail color for short nails?
Short nails actually have an advantage with detailed designs because there’s less surface area to fill, which means each design element reads more clearly. Icy blue with small snowflake accents, milky chrome, and jelly burgundy all work beautifully on short nails. Avoid very large patterns or oversized gems on short nails — they’ll overwhelm the nail bed.
How do I keep my cuticles from cracking in winter?
Cuticle oil every night, rich hand cream after every wash, and gloves when you go outside. If your cuticles are already cracked, apply a thicker balm (like Aquaphor or plain shea butter) before bed and wear cotton gloves overnight for a few days.
Are press-on nails a good option for December?
Honestly, yes — especially for accent nails or if you’re short on time. The quality has improved dramatically. A $10 set of press-ons with a good nail glue can last 5–7 days if you prep your nails properly (buff, wipe with alcohol, apply glue to both the nail and the press-on). I keep a set of chrome French press-ons in my drawer for emergencies.
What’s the difference between jelly polish and regular polish?
Jelly polish is more translucent and has a squishy, syrupy finish that lets light pass through. Regular polish is opaque. Jelly looks best built up in thin layers — two or three coats — while regular polish usually covers in one or two thicker coats. Jelly also tends to show streaks if you apply it too thickly.

Hi, I’m Ashley Miller, a wife, a busy mom, and someone who loves to share all the things that make life a little more fun and beautiful.
From easy DIY projects, delicious recipes, and chic hairstyles to nail ideas and home decor tips, I share everything I’ve learned and love.
My goal is to inspire other women to explore their creativity and make their homes even more special.