28 Summer Nail Designs I’d Actually Book (and the Ones I’d Skip)
I used to treat summer manicures like a personality test — every June I’d sit in the salon chair, flip through my saved folder, and panic-order something that looked nothing like me by July. The chrome was too much.
The neon French felt like a costume. Then a friend of mine, Renee, who paints nails out of her apartment in Queens, watched me spiral over a color wheel and said something that stuck: “You don’t need a new personality. You need a design that works with your actual life.”
That’s what this list is. Not a mood board of things that look good on a hand model who has never opened a box of hair dye.
These are the summer nail designs I’ve worn, stolen from friends, or watched clients request at Renee’s little dining-table setup — plus the ones I’d genuinely skip.
I’ve grouped them by vibe so you can find your lane fast, and I’ve thrown in real cost comparisons and a few things nobody tells you until your gel starts lifting on day four.
1. Milky Chrome
The first time I saw milky chrome in person, I thought the person’s nails were just better than mine — like her hand had been upgraded. It’s a sheer, milky pink or white base with chrome powder buffed over the top, and it catches light without looking like you wrapped your fingers in foil.
Here’s the thing nobody tells you: chrome powder over a cured gel base is what makes it look expensive. If you ask for chrome over regular polish, it’ll look dull by day three. Renee charges $55 for gel + chrome, and it lasts about two and a half weeks before the growth line starts bothering me. The trade-off is that chrome shows every single cuticle flake — so do a quick oil massage the night before, or your nail tech will side-eye you.
Pro tip: Ask for “soft chrome” rather than full mirror chrome. Full chrome reads very 2016-festival. Soft chrome over milky white is the version that looks like your nails are just naturally luminous.
2. Sorbet Chrome
This is milky chrome’s fruitier cousin — think pistachio, lavender, or peach gel with a chrome glaze on top. It sounds like a lot. It is not. The pastel base keeps the chrome from going full disco ball, and it photographs like you spent actual money on your hands.
I wore a pistachio sorbet chrome to a rooftop birthday in July and three separate people asked if I’d gotten them done “for the event.” I had not. I’d gotten them done on a Tuesday because I was avoiding a work deadline. That’s the energy you want.
3. Chrome French Tip
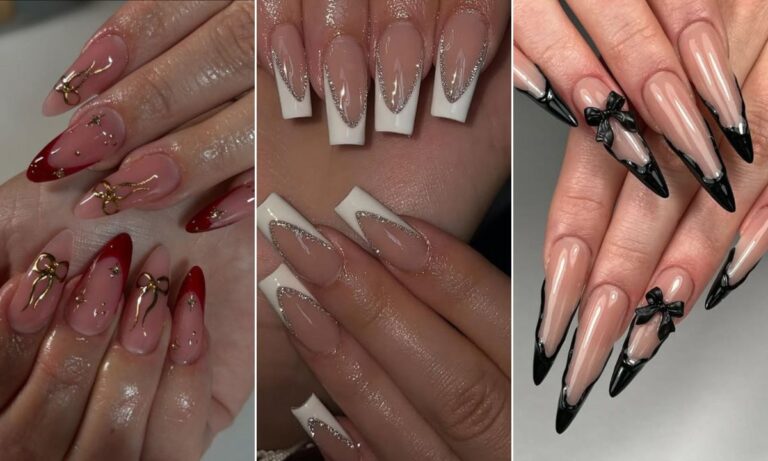
A chrome French tip is exactly what it sounds like: sheer pink base, chrome powder layered at the tip, finished with a bright edge color. It’s a nice middle ground if you like the idea of nail art but get overwhelmed by full designs. It also hides tip wear better than a solid chrome nail — the growth line just looks like part of the design for an extra few days.
My one warning: the tip shape matters more than the chrome. A square tip with chrome looks very 2004. Almond or soft squoval keeps it modern. I’d budget $60–$75 at a salon; press-on versions exist but the chrome finish on cheaper sets tends to look flat, not reflective.
Pro tip: If you’re doing chrome French at home with powder, cure the base gel for the full 60 seconds, not 30. Chrome grabs unevenly on under-cured gel and you’ll get patchy spots that look like smudges.
4. Frosted Chrome Overlay
This is the quietest chrome on the list — a soft chrome wash over a pink or milky white base, no tip color, no design. It’s what I’d call a “stealth manicure.” From across the room, it looks like clear polish. Up close, it has that frosty, lit-from-within thing happening.
I think of this as the design for people who work in offices where “visible nail art” would get a comment from a manager named Gary. It’s also the easiest chrome look to DIY if you already own a gel lamp. A $12 chrome powder and a $10 milky base polish will get you 80% of the salon result, as long as you don’t mind a slightly less crisp finish.
5. Micro Fruit Accent
Tiny strawberries, cherries, or lemons on one or two accent nails, paired with a plain or French base — this is the fruit trend’s more wearable sibling. The key word is micro. A full hand of hand-painted cherries is a commitment; one tiny lemon on your ring finger is a personality.
I tried the full fruit-salad look last summer and felt like a picnic table. The micro accent version is the one I’d actually repeat. Renee paints them with a 0.5mm liner brush and charges $15 extra on top of a gel mani. If you’re doing it at home, use a dotting tool and accept that your non-dominant hand will look… abstract. That’s fine. It’s summer.
6. Lemon Drop Martini
Hailey Bieber did this one and the internet lost its mind, which means your salon will know exactly what you’re talking about if you say “lemon drop”. It’s a zesty yellow base with tiny white polka dots — like a lemonade stand and a cocktail had a baby.
Here’s my honest take: the yellow has to be bright, not mustard, or the whole thing reads as a bruise. And the dots need to be small and sparse. If the dots are too big or too close together, it looks like a disease. I’d ask for three or four dots per nail, maximum.
Pro tip: Yellow polish is notoriously streaky. A good nail tech will do two thin coats over a white base coat, not three thick coats of yellow. If you’re DIY-ing, that white base is non-negotiable.
7. Strawberry Milk
This is a sheer, creamy pink — almost white-pink — with a jelly finish. It’s the nail equivalent of a strawberry milkshake that’s more milk than strawberry. It looks clean, it makes your hands look tanner, and it forgives a lot of cuticle sins.
I keep coming back to this one because it works on every skin tone and every nail length. Short nails look intentional. Long nails look elegant. It’s the closest thing to a universal summer nail design I’ve found. The downside? Sheer polish shows tip wear faster than opaque. I get about 10 days before I need a refresh, compared to two weeks with a solid color.
8. Cherry French
A classic French tip but in cherry red instead of white. That’s it. That’s the design. It’s barely a trend and more of a “why didn’t I think of this sooner” situation.
I saw a woman at the DMV with cherry French tips and spent the entire 45-minute wait trying to figure out if they were painted or press-ons. (Press-ons, it turned out — she told me when I finally asked, because I have no shame.) The point is: this design works on everyone. It’s also one of the easiest to DIY because the tip is the only part that needs precision. A steady hand and a $9 red polish will get you there.
9. Micro Neon French
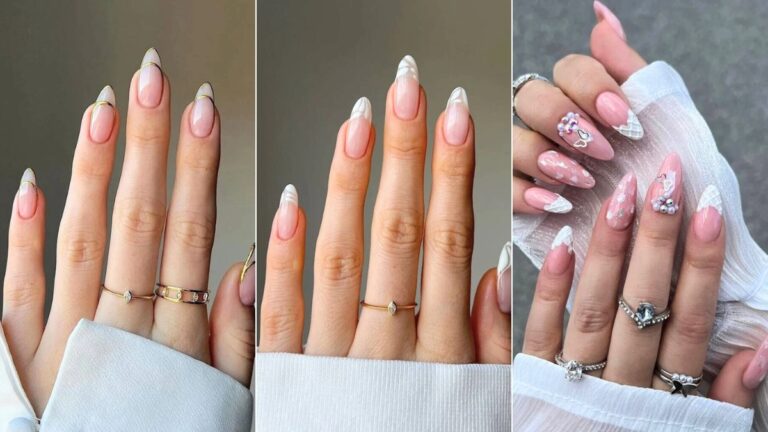
A whisper-thin French tip in a bright, saturated color — hot pink, orange, electric blue — over a sheer or nude base. The thin line is what makes it feel modern instead of mall-kiosk.
I’m going to be real with you: this one is harder to DIY than it looks. The line has to be really thin, and if your hand shakes even a little, it looks like a regular French tip that gave up. Salon price is usually $50–$65. The upside is that a micro French grows out gracefully — the tip just gets slightly thicker, and nobody notices for at least a week.
Pro tip: Ask for the tip color to be applied with a liner brush, not the polish brush. The liner brush is what gets that hairline edge. If your tech reaches for the bottle brush, gently ask.
10. Tonal French
Instead of a contrasting tip, the tip is a slightly deeper shade of the base color — peach base with a coral tip, lilac base with a violet tip. It’s a tonal look that reads as “I have a color theory understanding” without being loud.
This is the design I’d recommend to anyone who wants a manicure that survives a wedding, a work week, and a vacation without looking out of place at any of them. It’s neutral enough for conservative environments but interesting enough that you won’t be bored by day six.
11. Double French
Two thin French lines instead of one — usually one at the tip and one slightly lower, in the same or a contrasting color. It’s a small detail that makes a basic mani look like it took effort. (It did.)
I’ve only done this once, and my nail tech talked me into it. I’m glad she did. It’s the kind of design that makes people look at your hands twice, which is either a pro or a con depending on your personality. The cost is usually the same as a regular French, so if you’re already paying for a design, this is a good place to spend it.
12. Abstract French
The tip line isn’t a curve — it’s a wave, a diagonal, a jagged edge. It’s French manicure meets art class. This one is having a moment because it’s technically a “French” but visually it’s something else entirely.
My friend Maya, who is a graphic designer and therefore legally obligated to have opinions about lines, got an abstract French in cobalt blue and sent me a photo with the caption “I feel like a paintbrush.” That’s the vibe. It’s playful without being cartoonish. The trade-off is that abstract lines are harder to repair if one chips — a regular French tip can be patched; a wavy line usually needs a full redo.
Pro tip: Bring a reference photo of the exact line shape you want. “Abstract” means something different to every nail tech, and you don’t want to discover their interpretation after the gel is cured.
13. Princess Nails
Short, squoval-shaped nails with a sheer pink or milky rose polish and a glossy top coat — the “princess manicure” is basically the clean-girl mani’s softer, slightly shinier sister. It’s inspired by actual royal manicures, which is a fun fact I like to trot out at parties when I want people to leave me alone.
This is my default when I don’t know what I want. It’s not exciting, but it’s never wrong. The key is the shape — short and squoval, not round, not square. Round looks like a child’s manicure. Square looks aggressive. Squoval is the Goldilocks.
14. Milky Nude
A creamy, semi-sheer nude that’s more “milk” than “mannequin hands.” It’s the polish equivalent of a really good CC cream — it evens everything out without looking like you’re wearing anything.
I wore milky nude for a job interview once and got the job. I’m not saying the nails were responsible, but I’m not not saying it. The trick is finding the right undertone for your skin — a milky nude that’s too cool looks ashy on warm skin, and one that’s too warm looks dirty on cool skin. Swatch on your actual fingernail, not the plastic stick.
15. Soap Nails
Soap nails are the ultra-glossy, slightly milky, “I just washed my hands and they happen to look like this” manicure. It’s a sheer wash of color with a high-shine top coat, and it’s been quietly replacing the heavy gel look for people who want low maintenance.
I like this one for travel because it doesn’t show chips as dramatically as opaque polish. If a corner lifts, it just looks like your natural nail is showing through. The downside is that it offers zero coverage — if your nails are stained or uneven, soap nails will highlight that, not hide it.
Pro tip: Ask for a ridge-filling base coat under the sheer color. It smooths out the nail surface so the gloss reads as intentional shine, not “I forgot to use a base coat.”
16. Half-Moon Mani
A bare or sheer nail with a small crescent of color at the base, following the curve of your cuticle. It’s a vintage look that reads very “I have a favorite lipstick and it’s been discontinued.” Charlize Theron did a yellow half-moon that made the rounds this summer, and it’s a genuinely good short-nail design because it doesn’t require length to work.
The challenge is that the half-moon has to follow your actual cuticle curve, which means your nail tech needs a steady hand and a small brush. If the curve is off, it looks like your polish is growing out weirdly. I’d skip this one at a cheaper walk-in salon and save it for a tech you trust.
17. Polka Dots
Polka dots had a cool-girl comeback this summer, but not in the Minnie Mouse way you’re picturing. The current version is tiny, sparse dots on a sheer or milky base — almost an afterthought. Sabrina Carpenter’s “Manchild” video mani was a sheer nude base with teeny white dots, and it’s been saved on my Pinterest board since June.
The dot size is everything. A large dot looks like a sticker. A tiny dot looks like a design choice. If you’re DIY-ing, use the end of a bobby pin instead of a dotting tool — it gives you a smaller, more irregular dot that reads as hand-painted rather than stamped.
18. Aura Nails
A soft, diffused blend of two colors — usually a bright and a contrasting shade — that melts into the center of the nail like a glow. It’s an upgraded ombré, essentially. The effect is otherworldly in a good way, and it’s one of the few designs that looks equally good on short and long nails.
I got aura nails in lilac and lime green, which sounds like a smoothie order, and it was the most complimented manicure I’ve had in years. The catch is that aura nails require an airbrush or a very skilled hand with a sponge. A cheap version looks patchy. I’d budget $65–$80 for this one.
19. Abstract Squiggles
Freeform squiggles in contrasting brights or tonal shades, layered over a sheer or nude base — it’s playful and artistic without being literal. It’s basically a doodle on your nail, but intentional.
This is the design I’d choose if I were going on a trip and wanted my nails to feel like a souvenir. It’s also very forgiving if one nail chips — you can just add another squiggle. The trade-off is that it can look messy if the colors aren’t carefully chosen. Stick to two or three shades, not five.
Pro tip: If you’re doing squiggles at home, use a striping brush and thin acrylic paint instead of polish. Acrylic paint gives you more working time and dries matte, so you can seal it with a glossy top coat and get a cleaner contrast.
20. Pressed Flowers
Real or realistic dried flower decals encapsulated under a clear or milky gel layer. It’s romantic, a little vintage, and genuinely beautiful for weddings or summer events. It’s also the design most likely to make people grab your hand at a party.
I wore pressed flowers to a friend’s garden wedding and spent the entire cocktail hour explaining that no, they weren’t real flowers, and yes, they were under a gel layer. The encapsulation is what makes it work — if the flowers are just glued on top, they’ll catch on everything and peel off within days.
21. Beach Towel Stripes
Simple stripes in summery colors — coral, turquoise, yellow — that look like a beach towel. It’s the kind of design that sounds basic until you see it on the nail, and then it’s suddenly the most cheerful thing in your camera roll.
I did this with three colors per hand and it took my tech about 20 minutes longer than a solid mani. Worth it. The stripes don’t have to be perfectly straight — a little wobble makes it look hand-painted in a good way. If you’re DIY-ing, use tape for clean lines, but pull the tape off while the polish is still slightly wet.
22. Olive Nails
A green base with a tiny red dot in the center — an olive on a toothpick, basically. It’s a cocktail-hour manicure that’s been quietly gaining traction. It’s weird. It’s specific. It’s the kind of design that makes people ask “what is that?” in a good way.
I would never have thought of this on my own, but a reader emailed me a photo of her olive nails and I haven’t stopped thinking about them since. The green has to be a true olive, not a lime or a forest green — otherwise it looks like a different vegetable entirely.
Pro tip: Use a matte top coat on the green base and a glossy top coat on the red dot. The texture contrast makes the “olive” read more clearly from a distance.
23. Sea Glass
Sheer, watery greens and blues with a jelly finish — like sea glass you’d pick up on a beach. It’s soft, it’s slightly translucent, and it’s the most “vacation” a manicure can get without a literal palm tree.
I think of this as the thinking person’s mermaid nail. It’s not sparkly, it’s not 3D, it’s just a really good color with a glassy finish. The jelly texture is what sells it — a solid green would look like a Christmas nail. A sheer, buildable green looks like the ocean.
24. Oyster Shell
Pearlescent, slightly iridescent, with a bumpy 3D texture that mimics an oyster shell. This is a maximalist design, and it’s not for everyone. But if you’re going to a summer event and you want your nails to be the conversation piece, this is the one.
I haven’t worn this myself because I type for a living and 3D texture on my nails would last approximately four hours before I picked it off. But I watched Renee do a set for a client’s engagement party, and the result was genuinely sculptural. The cost is higher — usually $80–$100 — because it involves builder gel and molding.
25. Butter Yellow
The color of the summer, full stop. Butter yellow is soft, creamy, and slightly unexpected — it’s not a neon, it’s not a pastel, it’s just a warm, sunny yellow that makes your hands look sun-kissed.
I resisted butter yellow for weeks because I was convinced it would make my hands look sallow. It didn’t. It made them look like I’d been on vacation, which is the entire point of a summer manicure. The key is finding a shade with a little warmth — a cool-toned yellow will look chalky, but a warm, buttery one looks like melted ice cream.
26. Multi-Colored Skittle
A different bright color on every nail — not neon, not pastel, just confident brights that pop. It’s playful, it’s low-effort (no design skills required), and it’s the fastest way to make a basic manicure feel like a personality.
I did a skittle mani with five different shades of pink and orange and felt like a walking sunset for two weeks. The trick is to stay within a color family — a true skittle with red, blue, green, and purple can look like a kindergarten art project. A tonal skittle looks intentional.
Pro tip: Paint your skittle mani on press-on nails first, then apply them. You can rearrange the color order until it looks balanced, and you don’t have to commit to a full salon appointment for a design you might hate.
27. Cherry Red
A classic, slightly deep red — not a bright orange-red, not a burgundy. Cherry red is the color of a cherry cough drop, and it’s been quietly dominating summer nails because it’s bold without being trendy.
I keep a bottle of cherry red polish in my desk drawer. It’s the one color I never get tired of. It works on short nails, it works on long nails, it works on toes. The only thing I’d warn against is applying it in a rush — red polish shows every Streaky stroke, and a rushed red mani looks like a crime scene.
28. Aqua Glitter
A sheer aqua base with fine glitter suspended in it — not chunky craft glitter, but a fine, almost iridescent shimmer that looks like pool water in sunlight. It’s the most “summer” design on this list, and it’s also the most forgiving if your nails are short or uneven.
I wore aqua glitter to a pool party and someone asked if I’d gotten my nails done “professionally,” which is the highest compliment you can receive when you paid $12 for a bottle of polish. The fine glitter is what makes it work — chunky glitter looks like a school project, but fine shimmer looks like you know what you’re doing.
The Comparison Table I Wish I’d Had Years Ago
Here’s the real math on summer manicures, based on what I’ve paid in New York and what friends have paid in smaller cities. Prices vary, but the ratios are pretty consistent.
| Option | Typical cost | Time | Wear time | Best for |
|---|---|---|---|---|
| Salon gel + design | $50–$85 | 45–75 min | 2–3 weeks | Chrome, aura, 3D, anything requiring precision |
| Salon regular polish | $25–$40 | 30–45 min | 5–7 days | A quick color refresh before an event |
| Press-on nails (premium) | $12–$25 | 10–15 min | 1–2 weeks | Trying a trend without commitment; travel |
| Press-on nails (drugstore) | $6–$12 | 10 min | 3–7 days | A one-night event; kids’ parties |
| DIY gel kit | $30–$60 upfront | 30–45 min | 1–2 weeks | People who already own a lamp and have patience |
| DIY regular polish | $8–$15 per bottle | 20–30 min | 3–5 days | Skittle manis, simple art, people who like repainting |
Press-ons have gotten genuinely good in the last two years — Olive & June’s sets have lasted 18 days in testing, which is longer than some salon gels I’ve paid $70 for. If you’re going on a trip and don’t want to deal with a salon appointment, a $16 set of press-ons is not a compromise anymore. It’s a strategy.
Pro tip: If you’re choosing between gel and press-ons for a vacation, go press-on. Salt water and sunscreen break down gel faster than you’d think, and a press-on set lets you pop off a damaged nail and replace it without a salon visit. Bring a mini nail glue in your bag.
How I’d Start Over If I Were Building a Summer Nail Rotation From Scratch
I’d buy one really good milky nude polish, one cherry red, and one bottle of fine aqua glitter. That’s three bottles and about $30, and it covers 80% of the designs on this list — the milky nude is a base for chrome, dots, and micro fruit; the cherry red is a French tip and a full mani; the aqua glitter is a one-coat summer statement. Then I’d book one salon appointment for the design I can’t do myself — probably the aura or the chrome — and use press-ons for everything in between.
The thing I’ve learned from four summers of bad manicure decisions is that the best summer nail design isn’t the one that’s trending hardest. It’s the one you don’t have to think about after you leave the chair. If you’re not sure, start with milky nude and add one accent nail. You can always go bigger next time. And if you hate it, it’s just nails. They grow out. That’s the whole beauty of it.
FAQs
How much should I tip for a nail salon manicure?
15–20% is standard in most US cities, and 20% is appropriate for complex nail art that takes extra time. If your tech did hand-painted micro fruit or 3D work, 20% is the baseline, not the ceiling.
Do press-on nails damage your natural nails?
Not if you remove them properly. The damage comes from peeling them off — which strips the top layer of your nail plate — or from glue that’s too strong. Soak in warm soapy water with a little oil, then gently lift from the side with a cuticle stick. If you use adhesive tabs instead of glue, removal is even easier and the wear time drops to 3–5 days.
What’s the best nail shape for short nails?
Squoval or a soft almond. Round can make short nails look stubby, and square can look blocky. Squoval gives you a little length without requiring actual length.
Can I get chrome nails without gel?
You can, but it won’t last. Chrome powder needs a cured gel base to adhere properly. Over regular polish, it looks dull and rubs off within a day or two. If you’re committed to regular polish, skip chrome and go for a pearlescent shimmer polish instead.
How do I make a summer manicure last longer?
Two things make the biggest difference: a ridge-filling base coat (smooths the nail so polish adheres evenly) and a nightly cuticle oil habit. A drop of jojoba or avocado oil on each nail before bed, massaged into the cuticle and under the free edge, keeps the nail flexible so it bends instead of chips. Dermatologists recommend fragrance-free, simple formulas — and they specifically say don’t cut your cuticles, just push them back gently after a shower.
Are fruit nails still in for summer?
Yes, but the trend has shifted from full-hand fruit salad to micro accents — one or two tiny fruits on an otherwise plain or French manicure. The 3D molded fruit look is still around, but it’s more of a statement piece than an everyday mani.

Hi, I’m Ashley Miller, a wife, a busy mom, and someone who loves to share all the things that make life a little more fun and beautiful.
From easy DIY projects, delicious recipes, and chic hairstyles to nail ideas and home decor tips, I share everything I’ve learned and love.
My goal is to inspire other women to explore their creativity and make their homes even more special.