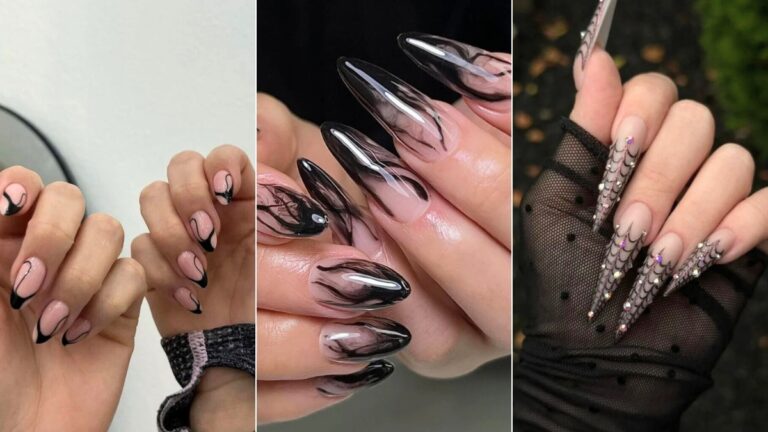
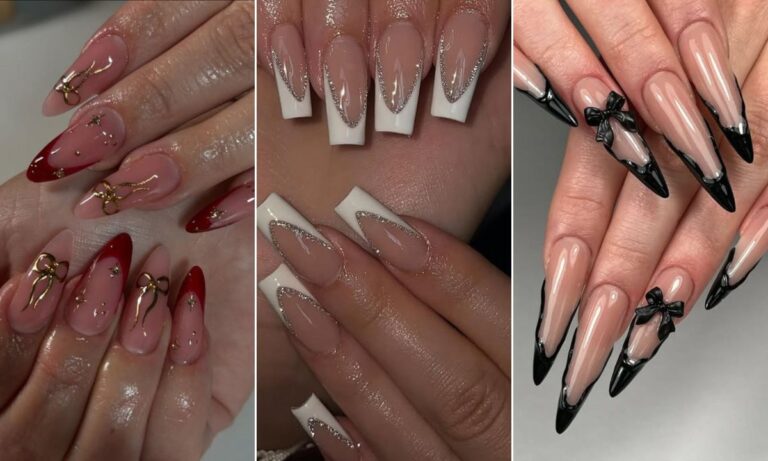
24 Barbie Nails That Are Actually Wearable (I Tried the Trends So You Don’t Have To)
I have a confession: I resisted Barbie nails for longer than I should have. My brain kept filing them under “fun for a party, impractical for a Tuesday.”
Then my friend Maya talked me into a hot pink chrome set before a wedding, and I spent the entire reception staring at my hands like a raccoon who found something shiny. The truth is, Barbie nails have grown up.
The 2026 versions aren’t the flat, uniform fuchsia of the movie summer anymore—they’re softer, more layered, and honestly easier to pull off than the internet makes them look.
Here’s the thing about this list: I’m not going to pretend every design is for everyone. Some of these are five-minute press-on situations. Some are a $90 salon appointment you’ll want to book with a reference photo.
And a few I’d personally skip because they look better in a photo than on a real hand holding a coffee cup. I’ve organized them by vibe and effort level, with the real cost and the trade-offs I’ve actually encountered.
If you’ve been searching for Barbie nail ideas that don’t feel costume-y, this is the list I wish I’d had before I wasted $40 on a shade that made my hands look vaguely ill. Let’s get into it.
1. Classic Glossy Hot Pink (The One That Started It All)
This is Barbie pink in its purest form, and honestly, sometimes the color itself is enough. A super glossy hot pink catches the light and reads instantly recognizable without any art, glitter, or chrome. The key is the finish—matte hot pink can look flat and slightly dated, but a high-shine topcoat makes the same shade look expensive.
I wore this for a week straight and the only downside was that I noticed every single chip. Hot pink shows wear more than nude, so if you’re hard on your hands (dishes, typing, toddler-wrangling), either go gel or plan on a mid-week touch-up.
Pro tip: Ask your tech for a “dry glossy” topcoat rather than a standard one. It cures harder and gives that wet, vinyl-like shine that makes cheap polish look salon-grade.
2. Barbie Pink French Tips With a Gold Line
A pink French tip is already a solid upgrade from the classic white, but a single thin gold line at the base of the tip makes it feel genuinely grown-up. It’s the difference between “I’m going to a Barbie-themed brunch” and “I’m going to a Barbie-themed brunch and I own property.”
I tried this with a medium almond shape, and the gold line caught the light without screaming for attention. The trade-off? Gold linework is fussy. If your tech freehands it and the line is uneven, it’s noticeable. Ask for a vinyl stencil or a striping brush, and don’t be afraid to speak up if the first nail looks wobbly.
Pro tip: If you’re DIYing this, paint the gold line with a striping polish before you seal the tip with topcoat. Sealing first makes the gold slide.
3. Bubblegum Pink Ombré Gradient
Soft bubblegum fading into a barely-there blush is the gentlest entry point into Barbie nails. It’s feminine without being loud, and on an almond shape the fade looks almost airbrushed. This is the design I recommend to anyone who says “I love the idea of pink nails but I don’t want to look like a eight-year-old’s birthday party.”
The catch is that ombré is a skill. A cheap salon will sometimes just sponge the color on and call it a gradient, which leaves visible texture. Run your finger across the nail before you leave—if you can feel ridges, it’s not blended properly.
Pro tip: Ombré looks best on a slightly longer almond or oval. On short square nails, the fade has less room to breathe and can look like a bruise.
4. Hot Pink With Silver Chrome (The “Futuristic Barbie” Look)
Hot pink and chrome together are not for hiding. The mirror-like silver finish makes the pink underneath look almost electric, and it photographs like nothing else. I did this for a concert and got stopped by two different people in the bathroom line asking where I got my nails done.
The real issue with chrome is longevity. Chrome powders sit on top of the color coat and can wear off at the edges within five to seven days, especially if you use your nails as tools (guilty). If you want the look to last two weeks, ask for encapsulated chrome or a chrome gel that’s cured under a hard topcoat.
Pro tip: Chrome shows every single ridge in your natural nail. If your nails are uneven or peeling, fix the surface first or the chrome will magnify the texture.
5. Glossy “Velvet” Hot Pink
A glossy topcoat can completely change how hot pink feels. Instead of matte and flat, the color becomes shiny, velvety, and slightly brighter. This is the version I reach for in summer when I want color but not art—it’s one bottle of polish and a good topcoat away from being done.
I’ll be real with you: this is the easiest design on the list to DIY, and also the easiest to mess up if your polish is old. Thick, gloopy polish will never dry glossy. Thin the polish with two drops of nail polish thinner (not acetone) and you’ll get a much smoother finish.
Pro tip: A quick-dry topcoat over wet polish can cause shrinkage at the tips. Float the topcoat slightly past the edge of the color to seal it.
6. Pink Jelly Translucent Nails
This is for anyone who loves shiny nails but wants something softer than opaque hot pink. The sheer pink jelly finish gives you a glassy, almost rose-quartz look while keeping the Barbie color light and translucent. It’s the “clean girl” version of Barbiecore, and it’s become my default when I want my hands to look neat without committing to a full color moment.
The downside is coverage. Jelly polish is sheer by design, so any ridges, stains, or peeling on your natural nail will show through. If your nails are stained from dark polish, use a ridge-filling base coat first or the jelly will look muddy rather than glassy.
Pro tip: Two thin coats of jelly look better than one thick coat. Thick jelly pools at the cuticle and cures unevenly.
7. Barbie Pink With a 3D Bow (The One I’d Skip for Everyday)
A raised 3D bow on a pink nail is pure Barbiecore. It’s adorable in photos and genuinely fun for a special occasion. But here’s my honest take: a 3D bow catches on hair, sweater sleeves, and the inside of every bag you own. I wore one for a birthday dinner and by day three I was actively avoiding putting my hand in my pocket.
If you love the look, ask for the bow on one accent nail only, and make sure your tech uses a flexible builder gel rather than hard acrylic for the bow. Flexible gel bends slightly when it snags instead of popping off and taking a layer of your natural nail with it.
Pro tip: 3D art is not a press-on-friendly design. If you’re going the press-on route, save the bows for a salon set.
8. Neon Barbie Pink Summer Nails
Neon pink is basically made for summer. It looks especially bright against sun-kissed skin, and it’s the shade I associate with poolside drinks and oversized sunglasses. On short nails, neon reads playful; on long nails, it reads full glam.
One thing nobody tells you about neon: it fades. Neon pigments are notoriously unstable in sunlight, and a gel neon can lose its pop within ten days. If you want the color to stay electric, ask for a neon gel with a UV-protective topcoat and keep your hands out of direct sun when you can.
Pro tip: Neon polish often needs a white base coat to reach full opacity. Without it, the color goes on streaky and takes four coats to look solid.
9. Pink Glitter Confetti Party Nails
If you’re going to sparkle, you might as well commit. Hot pink shimmer mixed with glitter confetti turns a basic manicure into proper party nails, and every time the light hits them, another little sparkle appears.
The trade-off is removal. Glitter is the enemy of a quick polish change. I’ve spent 25 minutes foil-wrapping glitter off my nails, and I’ve also made the mistake of peeling it off and taking surface layers of my nail with it. If you’re doing glitter at home, use a peel-off base coat so removal is a five-minute job instead of a project.
Pro tip: Ask for the glitter to be “encapsulated”—layered between two thin coats of builder gel—so the surface stays smooth and doesn’t snag on everything.
10. Barbie Pink Abstract Swirl Nail Art
Soft-pink swirls over a glittering pink base give you the Barbie palette without painting every nail the same shade. It’s the design I recommend for anyone who gets bored of a solid color after four days but doesn’t want a full set of mismatched art.
Abstract swirls are forgiving because they’re supposed to look organic. If your freehand line wobbles, it reads as intentional. That makes this a surprisingly good DIY option, as long as you use a fine-liner brush and a gel polish that doesn’t dry too fast.
Pro tip: Paint the swirl on a matte topcoat base if you want it to stand out. The contrast between glossy swirl and matte background makes the design look more deliberate.
11. Baby Pink to Barbie Ombré
This one starts soft and ends bold: a baby-pink base gradually turning into electric fuchsia at the tip. It’s sweet and dramatic at the same time, and on a coffin shape the fade elongates the nail beautifully.
The mistake I see most often is a gradient that goes from pale to hot pink too abruptly, which looks like a French tip that got smudged. Ask your tech to use three transition shades (blush, bubblegum, fuchsia) rather than two. The extra step is what makes the fade look seamless.
Pro tip: Ombré on a coffin shape works best when the fade starts halfway down the nail, not at the tip. Starting too low makes the nail look short.
12. Barbie Pink With Rhinestones
Rhinestones plus hot pink is extra in the best way—the crystal details make the manicure feel like it belongs inside a Barbie dream house. I like rhinestones on an accent nail rather than all ten, because a full set of crystals is a sensory experience (and not always a pleasant one when you’re typing).
The real cost consideration here is that rhinestones need to be set into wet gel or acrylic to stay put. Gluing them on top of cured polish is a shortcut that leads to a trail of tiny crystals in your coat pocket by day four. Ask for them set into the top layer and cured under a lamp.
Pro tip: If you’re doing rhinestones at home, use a tiny dot of gel topcoat and cure it for 60 seconds. Superglue makes the stone cloudy and is a nightmare to remove.
13. Pink Chrome French Tips (The Maximalist Version)
A chrome pink French tip is the design for people who think “subtle” is a dirty word. It has everything—a reflective tip, nail art in the form of stars or rhinestones, and a base that can be as simple or as extra as you want. This is the look that made me understand why people pay $100+ for a set.
But chrome French tips are a high-maintenance commitment. The chrome edge wears first, and once it starts to dull, the whole design looks tired. If you want the look to last, ask for a chrome gel rather than a powder, and get a topcoat refresh at the one-week mark if you can.
Pro tip: Chrome French tips look best when the base is a milky sheer pink rather than a nude. The contrast between soft base and hard chrome is what makes the design work.
14. Pink-on-Pink Tonal French Mani
This is the grown-up French manicure I wish I’d discovered sooner. A bubblegum base with a hot pink or fuchsia tip creates a tonal effect that’s playful without being loud, and the pink-on-pink combination is more forgiving than white tips when it grows out.
I tried this on a square shape and it was the first French manicure I didn’t feel compelled to remove after ten days. The grow-out line is much less obvious when the tip and base are in the same color family. If you’re someone who stretches a manicure to three weeks, this is your design.
Pro tip: Ask for the tip line to be slightly thicker than a classic micro-French. The wider line is what makes the tonal contrast visible.
15. Short Almond Barbie Nails (The Practical Choice)
Barbie nails don’t require length. A short almond shape in a bright pink is one of the most flattering and wearable versions of the trend. Almond elongates the finger visually, and short length means you can actually open a can of soda without assistance.
My friend Jess switched from long coffin acrylics to short almond gels and said the difference in daily life was immediate—she could type, cook, and put on earrings without thinking about her nails. The trade-off is that short almond limits how much art you can fit. Stick to a solid color, a thin French, or a single accent nail.
Pro tip: Short almond looks best when the taper starts at the sidewall, not at the tip. A taper that starts too late makes the nail look stubby.
16. Short Square Barbie Nails With a Glossy Finish
Square is the shape I recommend to anyone who loves a ’90s aesthetic or has wide nail beds. A short square in hot pink is graphic and clean, and the flat edge gives you a stable surface for simple art like stripes or a single rhinestone.
The one thing to know about square nails is that the corners are fragile. If you’re hard on your hands, ask for slightly rounded corners (“squoval”) rather than sharp 90-degree angles. Sharp corners chip first, and a chipped corner on a square nail is impossible to ignore.
Pro tip: Square nails look best with a ridge-filling base coat. The flat surface magnifies any unevenness in the natural nail.
17. Coffin Shape With a V-Cut French Tip
Coffin nails with a nude base and a hot pink V-cut French tip are genuinely iconic. The V shape draws the eye down the nail and makes the coffin silhouette look even more dramatic. Selena Gomez has worn a version of this, and it’s the design I see most often saved on Pinterest boards.
The V-cut is not a beginner design. If the angle is off, it looks like a French tip that got confused. Bring a reference photo and ask your tech to map the V with a striping brush before filling it in.
Pro tip: Coffin nails need a strong apex (the curve at the stress point) or they snap. If your tech files the coffin shape too flat, the nail will break at the sidewall within a week.
18. Fuchsia With Delicate Florals (The “Soft Barbiecore” Option)
Fuchsia doesn’t have to be loud. A fuchsia base with tiny hand-painted flowers is a subtle way to join the Barbiecore trend without losing a delicate feel. It’s the design I’d choose for a spring wedding or a brunch where I want my nails to be noticed but not the topic of conversation.
The trade-off is time. Hand-painted florals add 20–30 minutes to a salon appointment and usually push the price into a higher tier. If you’re on a budget, ask for floral decals or stickers rather than freehand painting—they look nearly identical at arm’s length and cost significantly less.
Pro tip: Delicate florals look best on a glossy finish. Matte topcoat can make small painted details look flat and less defined.
19. Pink Marble Effect Nails
A fuchsia marble effect is another way to do Barbie nails without going full neon. The marbled pattern adds depth and movement, and it photographs beautifully because every nail looks slightly different. It’s a good choice if you like the idea of nail art but don’t want a literal heart or bow on your finger.
Marble is a technique-heavy design. A cheap version looks like smudged polish rather than stone. Ask your tech if they use a marble gel or a watercolor technique—if they hesitate, pick a different design or a different salon.
Pro tip: Marble looks most realistic when the veins are thin and irregular. If the lines are too thick or too evenly spaced, it reads as a abstract stripe rather than stone.
20. Pink Glitter Cheetah Print (The “Wild Barbie” Look)
Bold cheetah print in pink glitter is not for the faint of heart, but it’s a genuinely fun way to do Barbiecore with a bit of edge. The mix of animal print and sparkle is unexpected, and it works especially well on a coffin or almond shape where there’s room for the pattern to breathe.
I’ll be honest: this is a look I admire on other people more than I enjoy wearing myself. Cheetah print on every nail is a lot of visual noise, and it limits what you can wear without clashing. If you want the vibe without the commitment, do cheetah on two accent nails and a solid pink on the rest.
Pro tip: Cheetah print looks best when the spots are slightly irregular. Perfectly uniform spots read as a sticker rather than a hand-painted pattern.
21. Pink Ombré With Chrome Accents
An ombré base with a chrome accent on one or two nails is a good middle ground between “simple” and “full art.” The gradient gives you color depth, and the chrome adds a reflective pop without covering the entire nail. I did this with a baby-pink-to-fuchsia fade and a silver chrome ring finger, and it was the most complimented set I’ve had all year.
The chrome accent nail is also practical: if the chrome wears at the edge, it’s isolated to one nail rather than ruining the whole design.
Pro tip: Put the chrome accent on your ring finger rather than your index finger. The ring finger catches light differently and shows off the chrome better in photos.
22. Milky Pink Base With Micro White Lines
This is the most “quiet luxury” version of Barbie nails on the list. A milky, almost translucent pink base with thin white lines—either abstract or geometric—gives you the softness of a jelly manicure with a tiny bit of graphic interest. It’s the design I’d wear to a work event where I want my nails to look intentional but not distracting.
Micro linework requires a steady hand and a fine brush. If you’re DIYing it, practice the lines on a silicone mat first. If you’re going to a salon, ask for a striping gel rather than regular polish—it holds its shape better and doesn’t spread under topcoat.
Pro tip: White lines on a milky base can yellow if the topcoat is old. Use a non-yellowing topcoat and replace it every six months.
23. Pink Jelly With a Single Gold Flake Accent
If you love the jelly trend but want a little more interest, add a single gold flake or a thin gold line to one nail. It’s a small detail that makes the manicure feel intentional rather than unfinished, and it’s one of the lowest-maintenance art options on this list.
Gold flake is also forgiving. Unlike rhinestones, it doesn’t catch on things, and unlike painted art, it doesn’t require precision. I’ve done this at home with a cheap gold flake topcoat and a jelly polish, and it looked like a salon set from a distance.
Pro tip: Apply the gold flake while the jelly polish is still tacky, then seal with a thick topcoat. If the jelly is fully cured, the flake won’t adhere properly.
24. The “Barbie Dream House” Mix-and-Match Set
The final idea is less a single design and more a philosophy: mix and match. One nail gets a bow, one gets a rhinestone, one is solid hot pink, one is a French tip, one is glitter. This is the most Barbiecore approach because it’s playful and doesn’t take itself too seriously.
The key to making a mismatched set look intentional rather than chaotic is to repeat at least one element across all ten nails—usually the base color or the finish. If every nail is a completely different color and a different design, it reads as a nail art sampler rather than a cohesive set.
Pro tip: Plan the layout before your appointment. Decide which nails get which design on a notes app, and bring a screenshot. Freestyling a mix-and-match set at the salon almost always ends with at least one nail you don’t love.
Barbie Nails Cost Comparison: Salon vs. Press-On vs. DIY
Here’s the thing nobody puts in a Barbie nail roundup: the price difference between these three routes is massive, and the “best” option depends entirely on how long you need the set to last and how much time you have.
| Method | Typical Cost | Time Investment | Longevity | Best For |
|---|---|---|---|---|
| Salon gel/acrylic | $60–$120+ | 60–90 minutes | 2–3 weeks | Special occasions, complex art, people who want zero effort |
| Press-on nails | $10–$30 | 15–20 minutes | 5–10 days | Testing a trend, short-term wear, travel, budget-conscious |
| DIY polish | $8–$15 (supplies) | 30–45 minutes (plus dry time) | 3–7 days | Simple designs, people who enjoy the process, frequent color changers |
Press-on nails have gotten genuinely good in the last two years. A $17 set can last two to three weeks if you prep your nail properly and avoid soaking your hands. The trade-off is that press-ons rarely handle 3D art or chrome as well as a salon set, and the sizing has to be right or they look bulky at the cuticle.
Pro tip: If you’re going the press-on route for a Barbie nail look, spend the extra $5 on a set that includes a mini file and cuticle stick. The application kit is the difference between “these look fake” and “wait, are those your nails?”
Frequently Asked Questions About Barbie Nails
Do Barbie nails have to be long?
Absolutely not. Short almond and short square shapes are some of the most flattering and wearable versions of the trend. In fact, short nails often look more modern because they let the color and finish do the work without the distraction of length.
What’s the difference between Barbie pink and hot pink?
Barbie pink is a broad category, but it generally refers to a bright, cool-toned pink that leans slightly fuchsia. Hot pink is warmer and more red-based. If you want the classic Barbie look, ask for a “cool fuchsia” or a “bubblegum pink” rather than a “hot pink”—the undertone makes a difference on most skin tones.
Can I get Barbie nails with press-ons?
Yes, and the options are much better than they used to be. Press-on sets now come in coffin, almond, and square shapes with chrome, glitter, and even 3D details. The key is prep: buff your natural nail, use the included adhesive tabs or glue, and avoid water for the first hour.
How do I make chrome Barbie nails last longer?
Chrome wears at the edges first. Ask for encapsulated chrome (chrome sealed under a hard gel topcoat) rather than chrome powder on top of the color. At home, apply a thin layer of topcoat every three days to the tip edge to seal the chrome and prevent lifting.
Are Barbie nails appropriate for work?
The color is fine in most workplaces, but the art matters more than the shade. A solid hot pink or a tonal French is office-appropriate in most environments. 3D bows, rhinestones, and heavy glitter are more of a weekend choice. If you’re unsure, stick to a short almond or square in a glossy solid color—it reads polished rather than playful.
What’s the best Barbie nail color for dark skin tones?
Bright fuchsia and cool-toned hot pinks pop beautifully on deep skin tones. If you want a softer look, a berry-leaning pink or a magenta with a slight purple undertone is stunning. Avoid pinks with a heavy white base if you want the color to look rich rather than chalky.
What I’d Do First If I Were Starting Over
If I could go back to the beginning of my Barbie nail experiment, I’d skip the long coffin acrylics with the 3D bow and start with a short almond gel in a glossy hot pink. It’s the version I wore the longest, got the most compliments on, and didn’t have to think about while opening a package or washing my hair. The art is fun, but the color and the finish are what make Barbie nails work in real life. Start there, figure out which shade makes you feel like you, and then add the chrome and the rhinestones when you’re ready. The best Barbie nail is the one you forget you’re wearing until someone else points it out.

Hi, I’m Ashley Miller, a wife, a busy mom, and someone who loves to share all the things that make life a little more fun and beautiful.
From easy DIY projects, delicious recipes, and chic hairstyles to nail ideas and home decor tips, I share everything I’ve learned and love.
My goal is to inspire other women to explore their creativity and make their homes even more special.