How to Fix a Leaky Faucet?
A leaky faucet is annoying. It wastes water. It increases bills. It can cause damage. But fixing it is easy.
This guide will help. It will explain step by step. You can do it yourself. No need to call a plumber. Save money and time.
So let’s get started. A small drip may seem harmless. But over time it adds up. A single leak can waste gallons. It can stain sinks. It can damage fixtures. Stopping leaks quickly is important.

Tools You Will Need
Before starting gather the right tools. You will need these items:
- Adjustable wrench
- Screwdriver (flathead or Phillips)
- Replacement washers or O-rings
- Plumber’s tape
- Towel or rag
- Bucket or bowl
Having everything ready saves time. It prevents mid-repair delays. Make sure the tools are within reach.
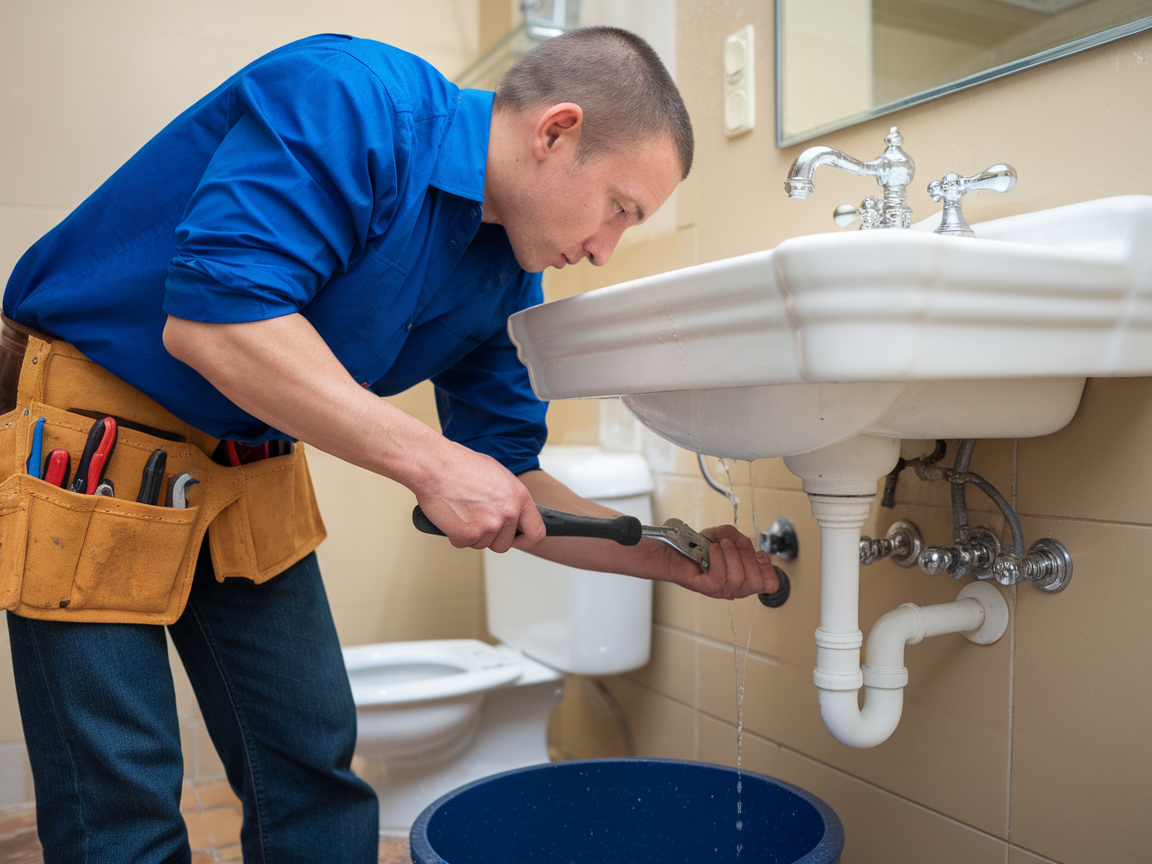
Step 1: Turn Off the Water Supply
Safety first. Shut off the water. Look under the sink. Find the shutoff valves. Turn them clockwise. This stops water flow.
If no valves exist turn off the main supply. It is usually near the water meter. This prevents flooding.
Test the faucet. Turn it on. No water means success. If water still flows check valves again.
Step 2: Plug the Drain
Use a stopper or rag. Cover the drain. This prevents small parts from falling. It avoids frustration later.
A bucket under the sink helps too. It catches drips. It keeps the area dry.
Step 3: Remove the Faucet Handle
The handle hides the inner parts. Locate the screw. It may be under a decorative cap. Pry it off gently.
Use the right screwdriver. Loosen the screw. Lift the handle off. If stuck wiggle it slightly. Avoid using excessive force.
Step 4: Take Out the Valve Stem
The valve stem controls water flow. Unscrew the retaining nut. Use an adjustable wrench. Turn counterclockwise.
Pull the stem out carefully. Inspect it for damage. Look at the washers and O-rings. These often cause leaks.
Step 5: Replace Worn Parts
Worn washers are common culprits. Remove the old one. Take it to a hardware store. Match the size.
Install the new washer. Ensure a snug fit. If O-rings are damaged replace them too. Apply plumber’s tape for better sealing.
Step 6: Reassemble the Faucet
Put the valve stem back. Tighten the retaining nut. Do not over-tighten. It can strip threads.
Reattach the handle. Secure it with the screw. Replace the decorative cap.
Step 7: Turn the Water Back On
Open the shutoff valves. Turn them counterclockwise. Let water flow slowly. Check for leaks.
Turn the faucet on. Test hot and cold. If no drips appear you succeeded. If leaks persist repeat steps.
Step 8: Clean Up
Wipe the area dry. Store tools properly. Dispose of old parts. Enjoy your leak-free faucet.
Common Faucet Types and Fixes
Different faucets have different mechanisms. Here’s how to handle each:
Compression Faucets
These have separate hot and cold handles. They use rubber washers. Replace these washers to stop leaks.
Ball Faucets
They have a single handle. A rotating ball controls flow. Worn-out springs or seals cause leaks. Replace the entire assembly if needed.
Cartridge Faucets
They also have one handle. A cartridge inside regulates water. Replace the cartridge if leaking.
Ceramic Disk Faucets
These are durable. But debris can cause leaks. Clean the disks or replace them.
Preventing Future Leaks
Maintenance helps avoid leaks. Follow these tips:
- Do not overtighten handles.
- Clean aerators regularly.
- Replace parts before they fail.
- Use quality washers and O-rings.
A little care extends faucet life. It saves money long-term.
When to Call a Professional
Some leaks are complex. Call a plumber if:
- Leaks persist after repair.
- Pipes are corroded.
- Water pressure drops.
- You lack proper tools.
Do not risk major damage. Experts handle tough jobs.
Final Thoughts
Fixing a leaky faucet is simple. Follow the steps carefully. Use the right tools. Replace worn parts. Test thoroughly.
A small effort brings big rewards. No more drips. No more wasted water. Just a smoothly working faucet.
Now you know how. Go ahead and fix it. Be proud of your DIY skills.
FAQs
1. Why does my faucet still leak after replacing the washer?
The valve seat may be damaged. Use a seat wrench to smooth it. Or replace the entire valve.
2. How often should I replace faucet washers?
Every 2-3 years. Or sooner if leaks appear. Regular checks help.
3. Can I use any washer for my faucet?
No. Size and material matter. Match the old washer exactly.
4. What if my faucet has no visible screws?
Check for hidden caps. Some screws are under decorative covers.
5. Is plumber’s tape necessary?
Yes. It ensures a tight seal. Wrap it clockwise around threads.
Fixing leaks is easy. Now you can do it confidently.

Hi, I’m Ashley Miller, a wife, a busy mom, and someone who loves to share all the things that make life a little more fun and beautiful.
From easy DIY projects, delicious recipes, and chic hairstyles to nail ideas and home decor tips, I share everything I’ve learned and love.
My goal is to inspire other women to explore their creativity and make their homes even more special.